> ## Documentation Index
> Fetch the complete documentation index at: https://encrova-docs.platform.ai71services.ai/llms.txt
> Use this file to discover all available pages before exploring further.
# Encrova SSH
> Learn how to generate SSH credentials to provide secure and centralized SSH access control for your infrastructure.
## Concept
Encrova can be used to issue SSH credentials to clients to provide short-lived, secure SSH access to infrastructure;
this improves on many limitations of traditional SSH key-based authentication via mitigation of private key compromise, static key management,
unauthorized access, and SSH key sprawl.
The following concepts are useful to know when working with Encrova SSH:
* SSH Certificate Authority (CA): A trusted authority that issues SSH certificates.
* Certificate Template: A set of policies bound to a SSH CA for certificates issued under that template; a CA can possess multiple templates, each with different policies for a different purpose (e.g. for admin versus developer access).
* SSH Certificate: A short-lived, credential issued by the SSH CA granting time-bound access to infrastructure.
```mermaid
graph TD
A[SSH CA]
A --> B[Certificate Template A]
A --> C[Certificate Template N]
B --> D[SSH Certificate A]
C --> E[SSH Certificate N]
```
When using Encrova SSH to provision client access to a remote host, an operator must create a SSH CA in Encrova; a certificate template under it,
specifying policies such as allowed users that can be requested under that template by a client; and configure the host to trust certificates issued by the Encrova SSH CA.
When a client needs access to a host, they authenticate with Encrova and request a SSH certificate (and optionally key pair)
to be used to access the host for a time-bound session as part of the SSH operation.
## Client Workflow
The following sequence diagram illustrates the client workflow for accessing a remote host using an SSH certificate (and optionally key pair)
supplied by Encrova.
```mermaid
sequenceDiagram
participant Client as Client
participant Encrova as Encrova (SSH CA)
participant Host as Remote Host
Note over Client,Client: Step 1: Client Authentication with Encrova
Client->>Encrova: Send credential(s) to authenticate with Encrova
Encrova-->>Client: Return access token
Note over Client,Encrova: Step 2: SSH Certificate Request
Client->>Encrova: Make authenticated request for SSH certificate via either /api/v1/ssh/issue or /api/v1/ssh/sign
Encrova-->>Client: Return signed SSH certificate (and optionally key pair)
Note over Client,Client: Step 3: SSH Operation
Client->>Host: SSH into Host using the SSH certificate
Host-->>Client: Grant access to the host
```
At a high-level, Encrova issues a signed SSH certificate to a client that can be used to access a remote host.
To be more specific:
1. The client authenticates with Encrova; this can be done using a machine identity [authentication method](/documentation/platform/identities/machine-identities) or a user [authentication method](/documentation/platform/identities/user-identities).
2. The client makes an authenticated request for an SSH certificate via either the `/api/v1/ssh/issue` or `/api/v1/ssh/sign` endpoints. Note that if the client wishes to use an existing SSH key pair, it can use the `/api/v1/ssh/sign` endpoint; otherwise, it can use the `/api/v1/ssh/issue` endpoint to have Encrova issue a new SSH key pair in conjunction with the certificate.
3. The client uses the issued SSH certificate (and potentially SSH key pair) to temporarily access the host.
Note that the workflow above requires an operator to perform additional
configuration on the remote host to trust SSH certificates issued by
Encrova.
## Guide to Configuring Encrova SSH
In the following steps, we explore how to configure Encrova SSH to start issuing SSH certificates to clients as well as a remote host to trust these certificates
as part of the SSH operation.
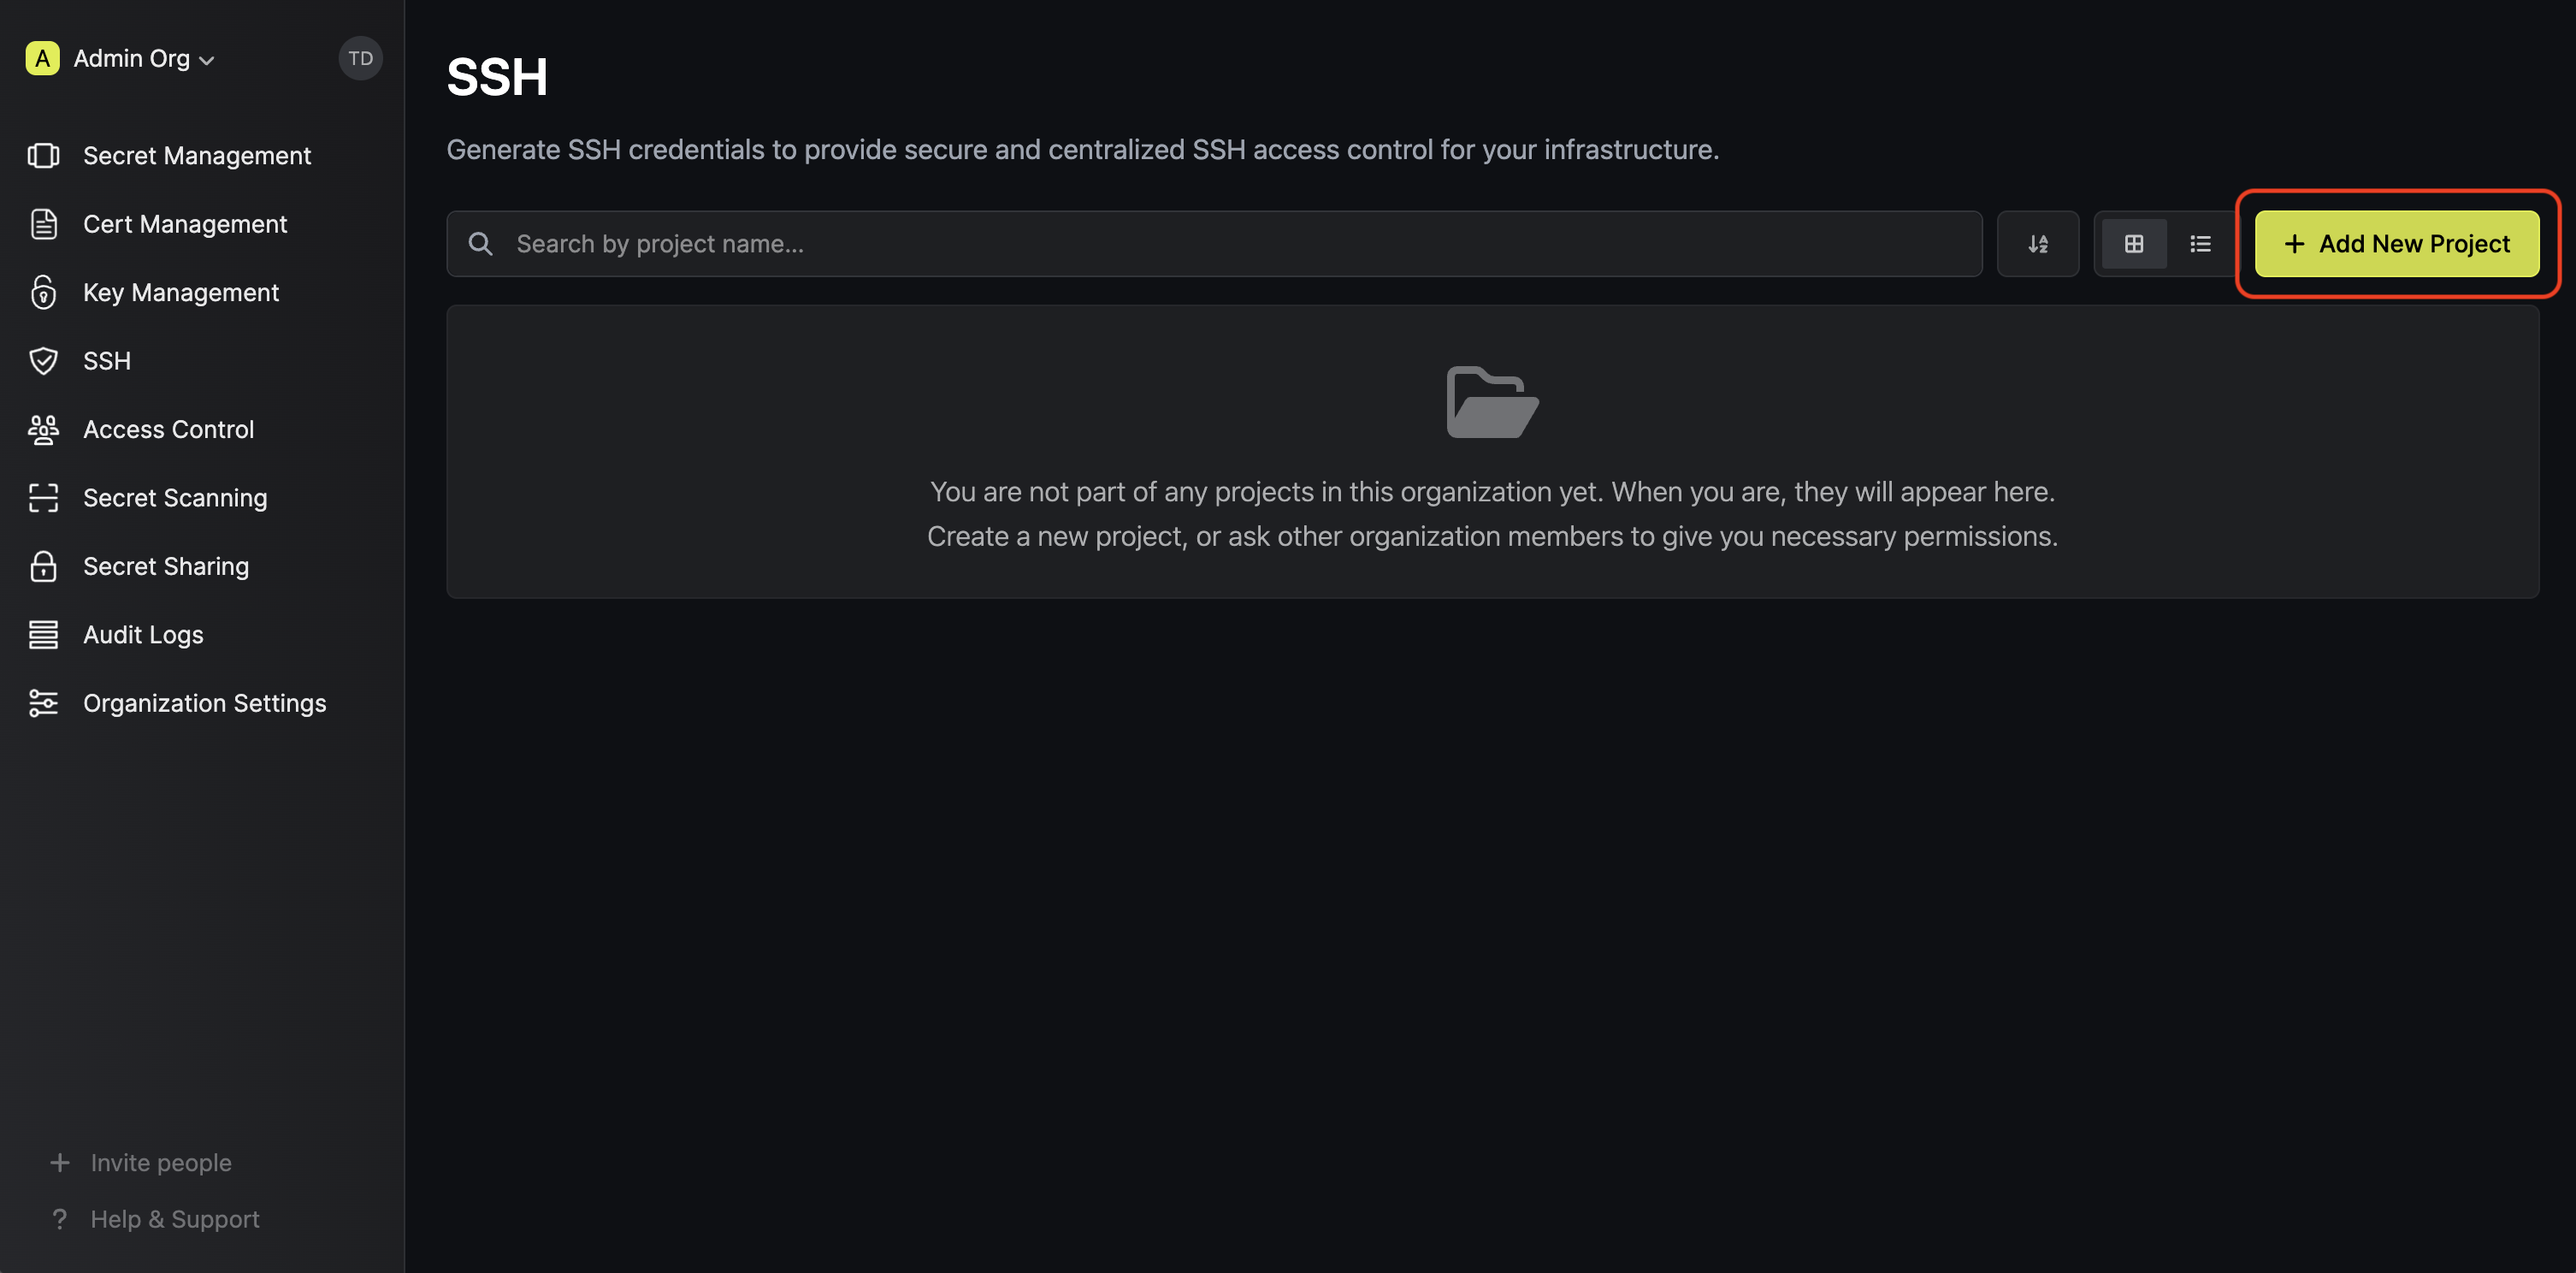
1.1. Start by creating a SSH project in the SSH tab of your organization.
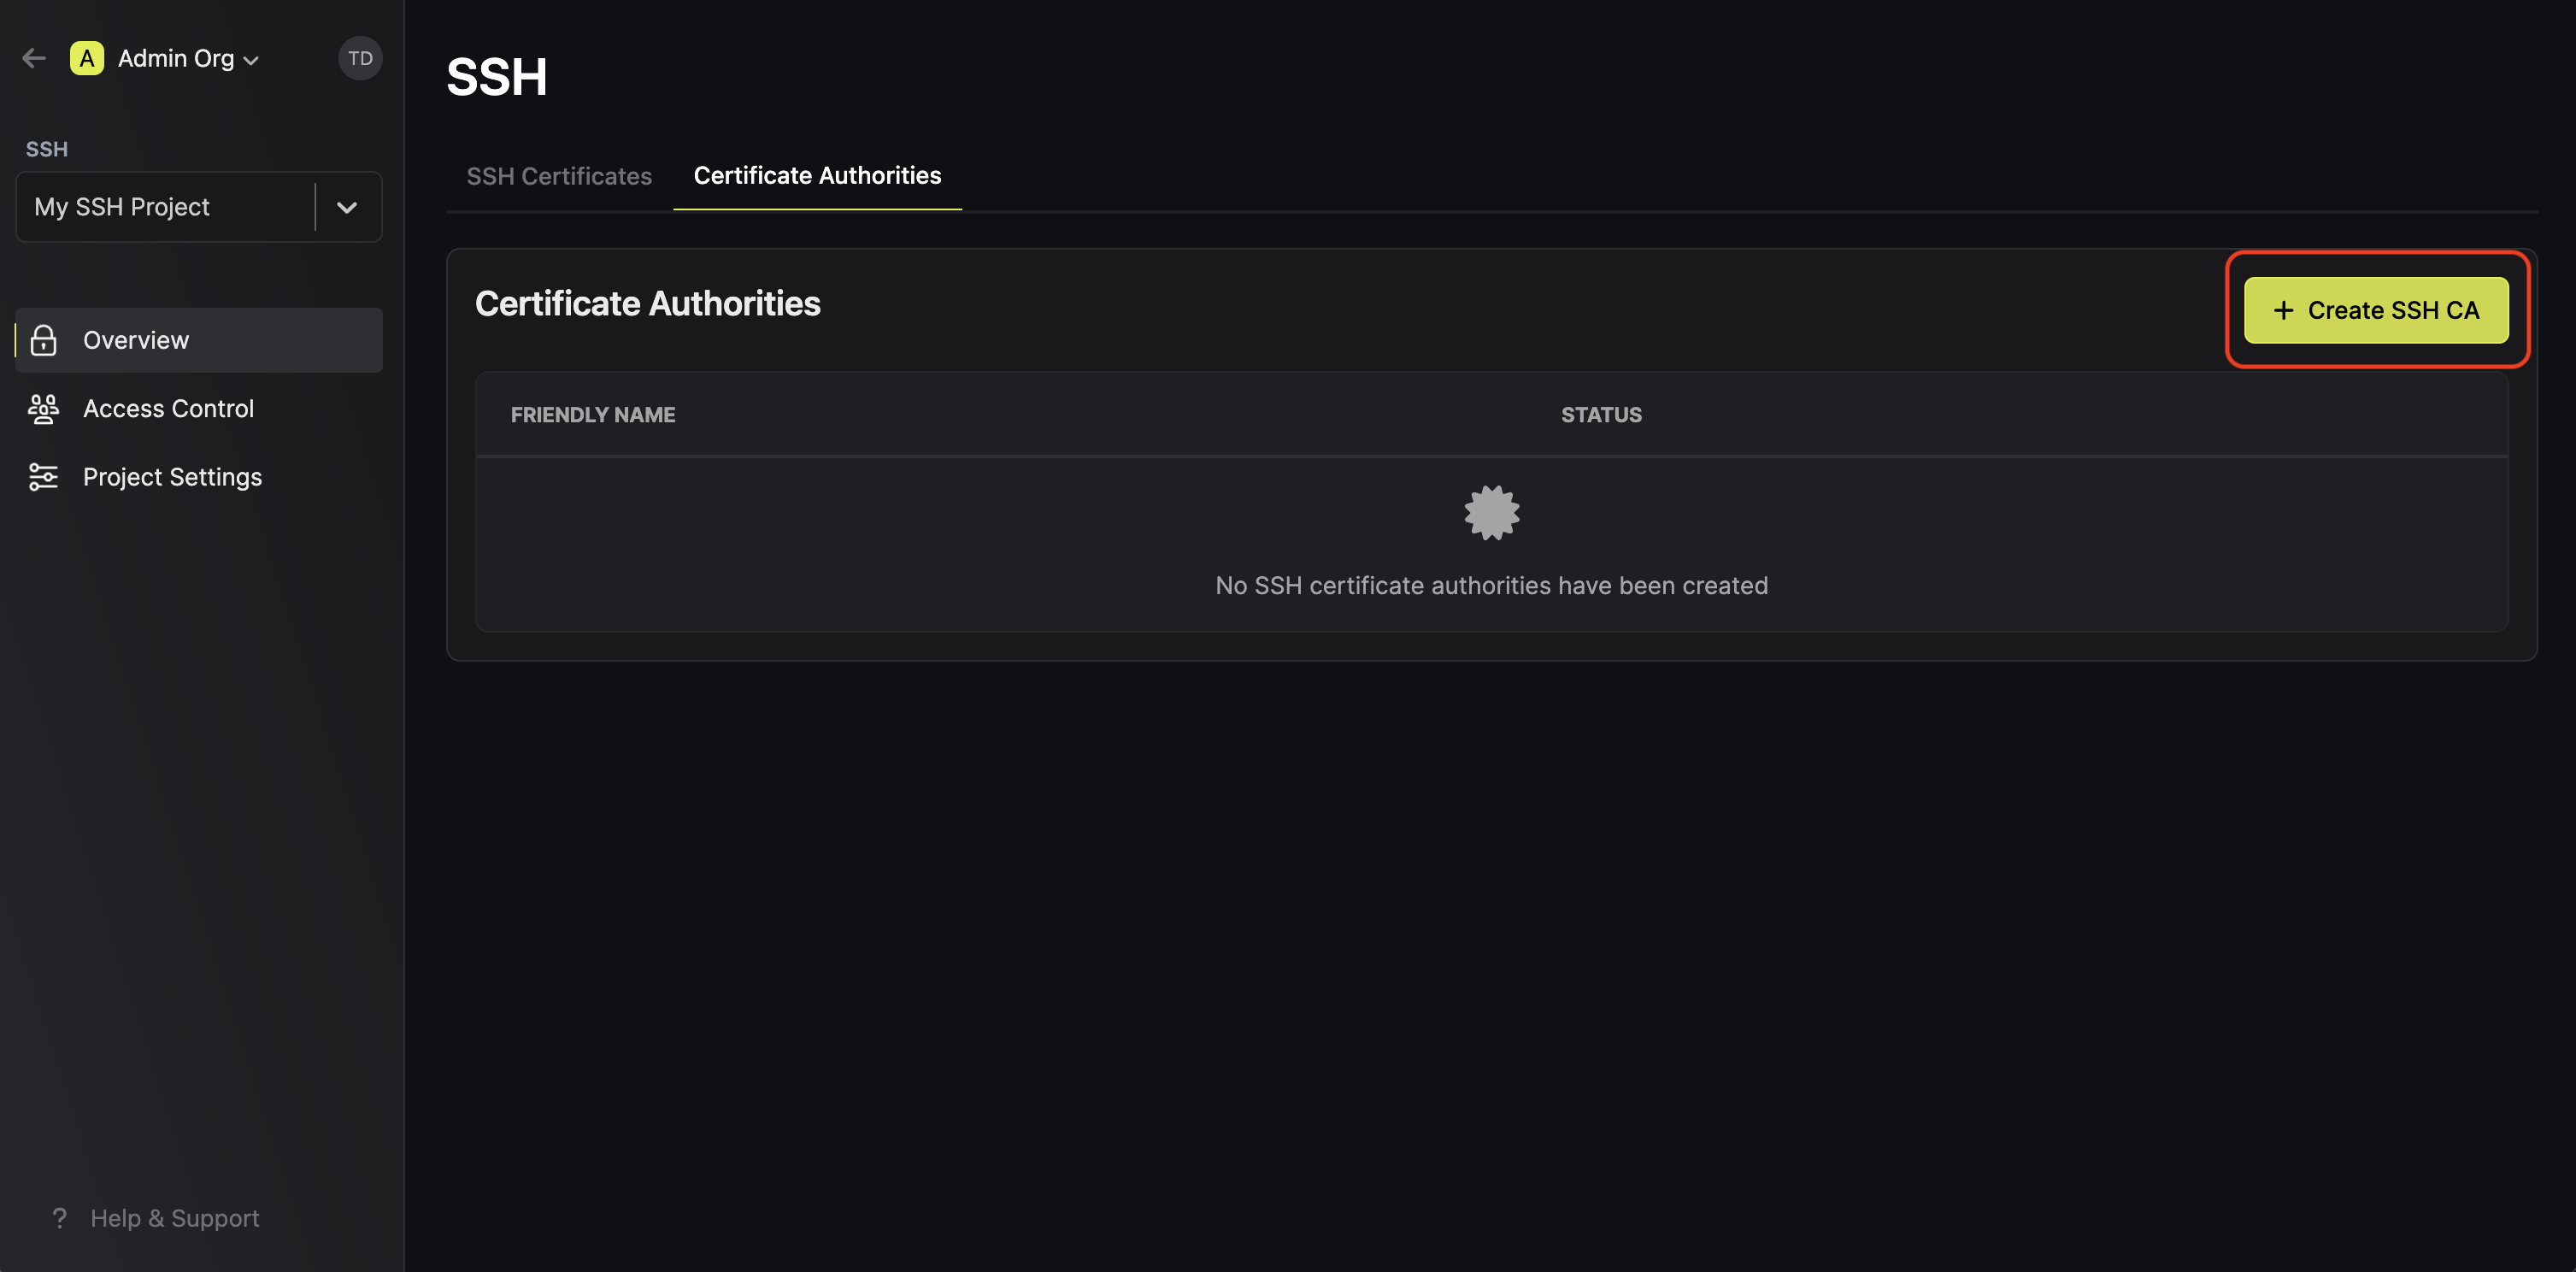
 1.2. Next, create a CA in the **Certificate Authorities** tab of the
project.
1.2. Next, create a CA in the **Certificate Authorities** tab of the
project.
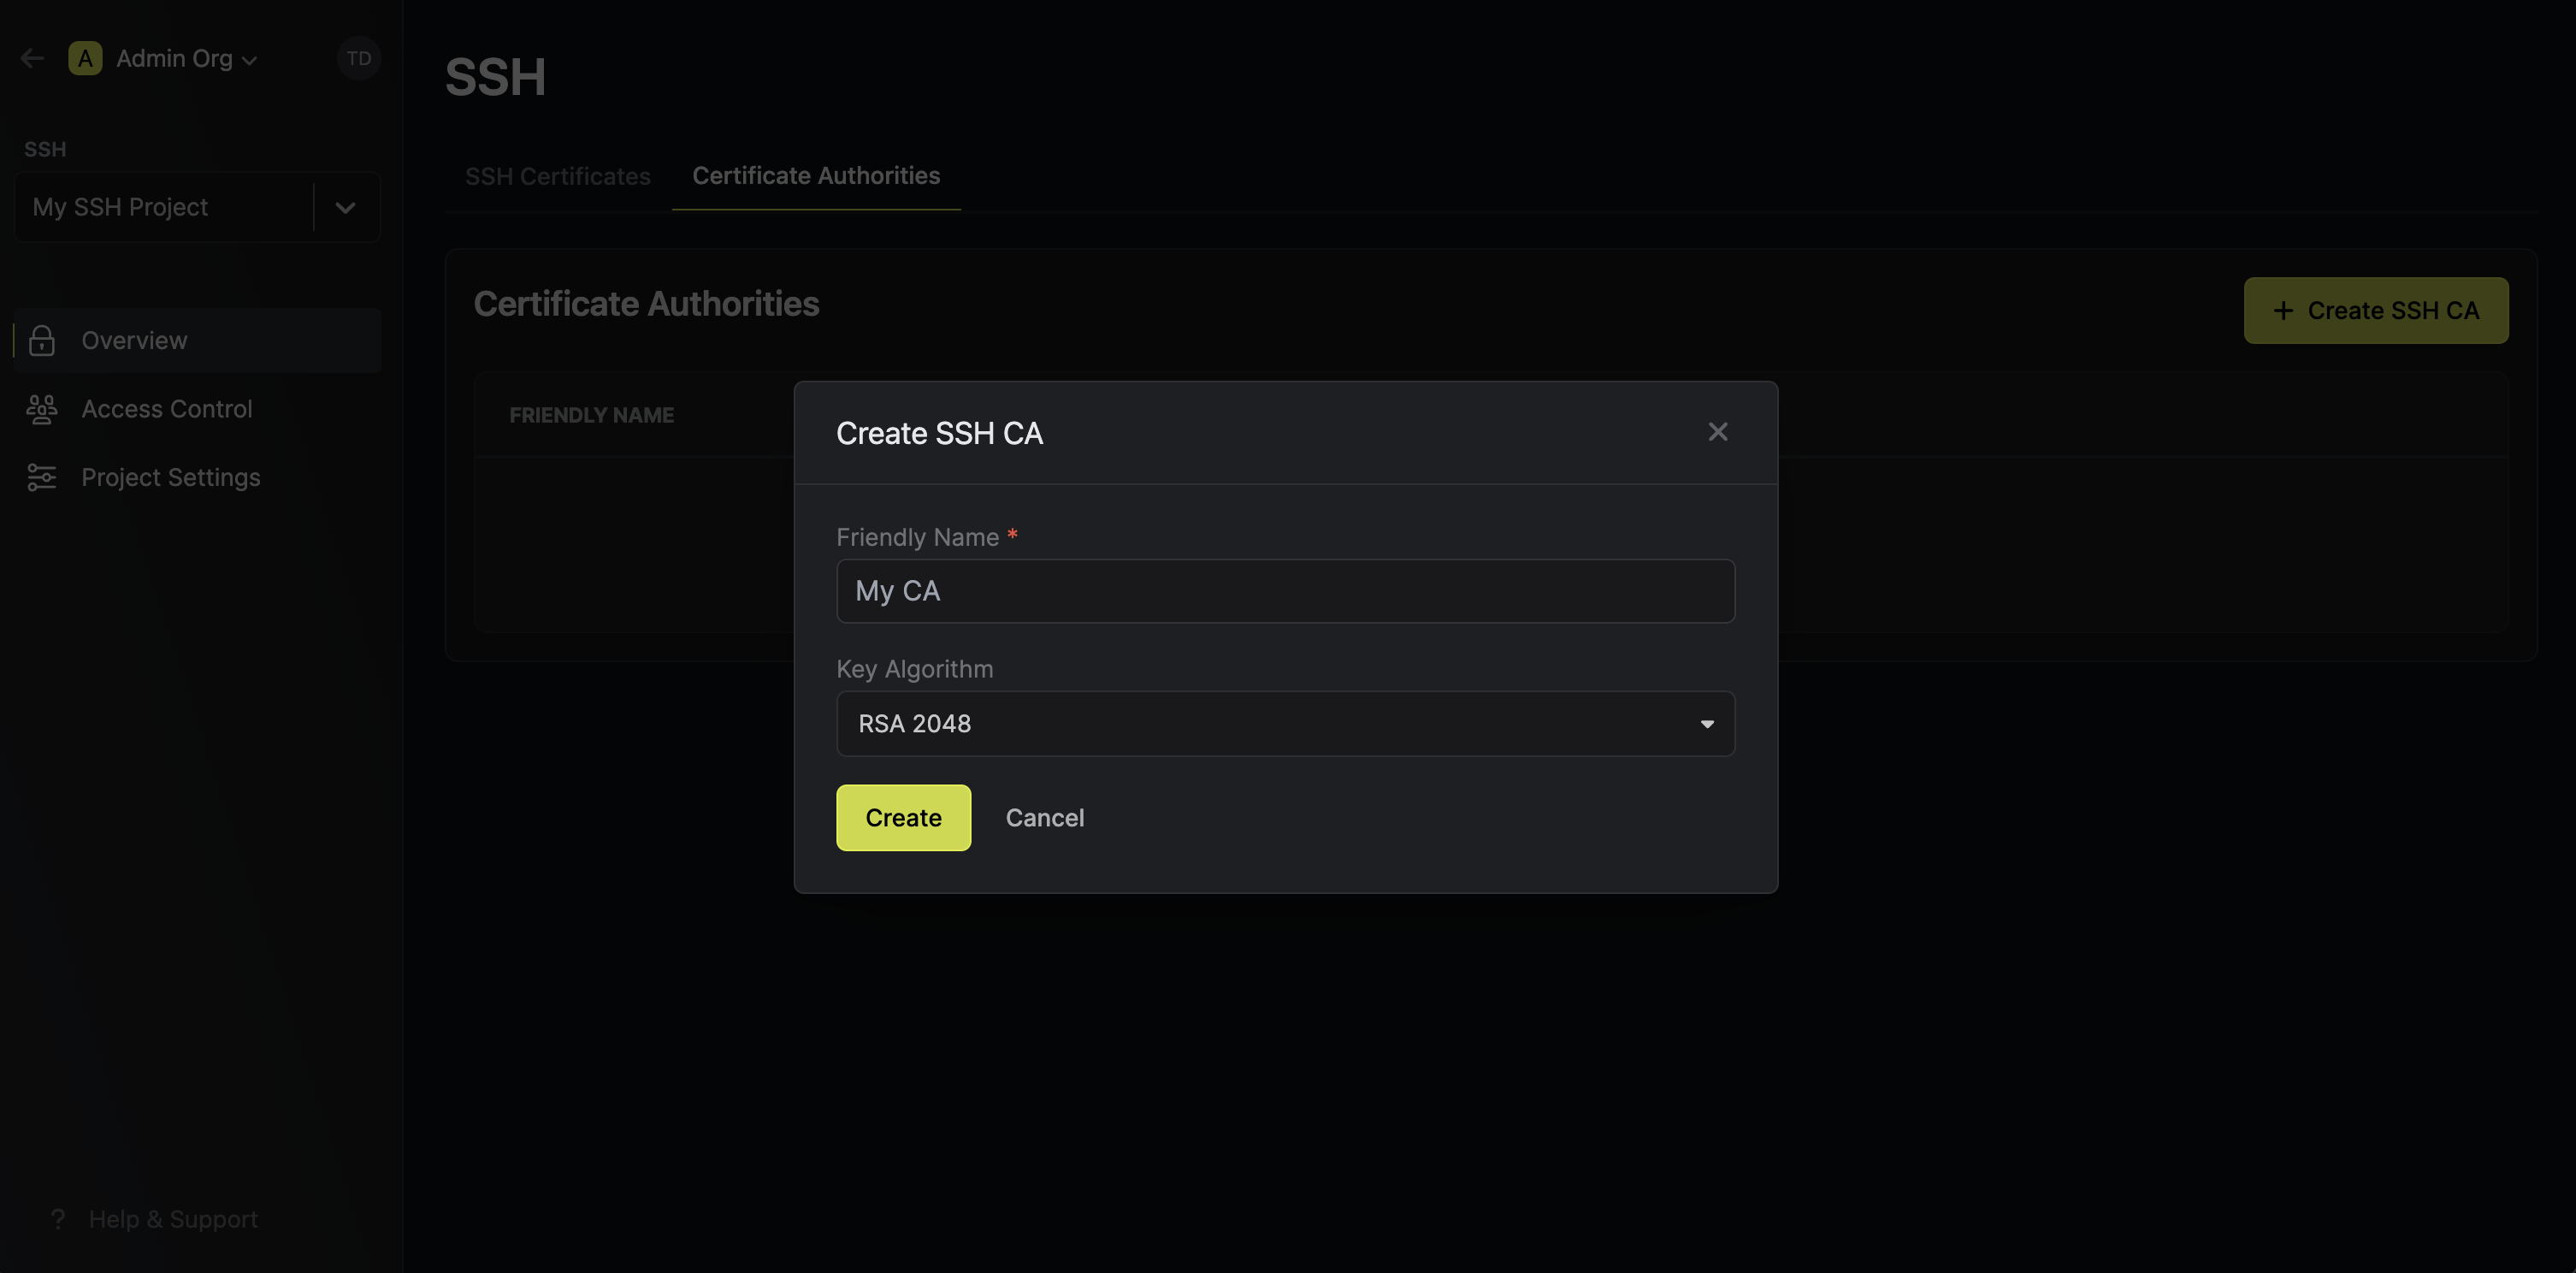 Here's some guidance on each field:
* Friendly Name: A friendly name for the CA; this is only for display.
* Key Algorithm: The type of public key algorithm and size, in bits, of the key pair for the CA. Supported key algorithms are `RSA 2048`, `RSA 4096`, `ECDSA P-256`, and `ECDSA P-384` with the default being `RSA 2048`.
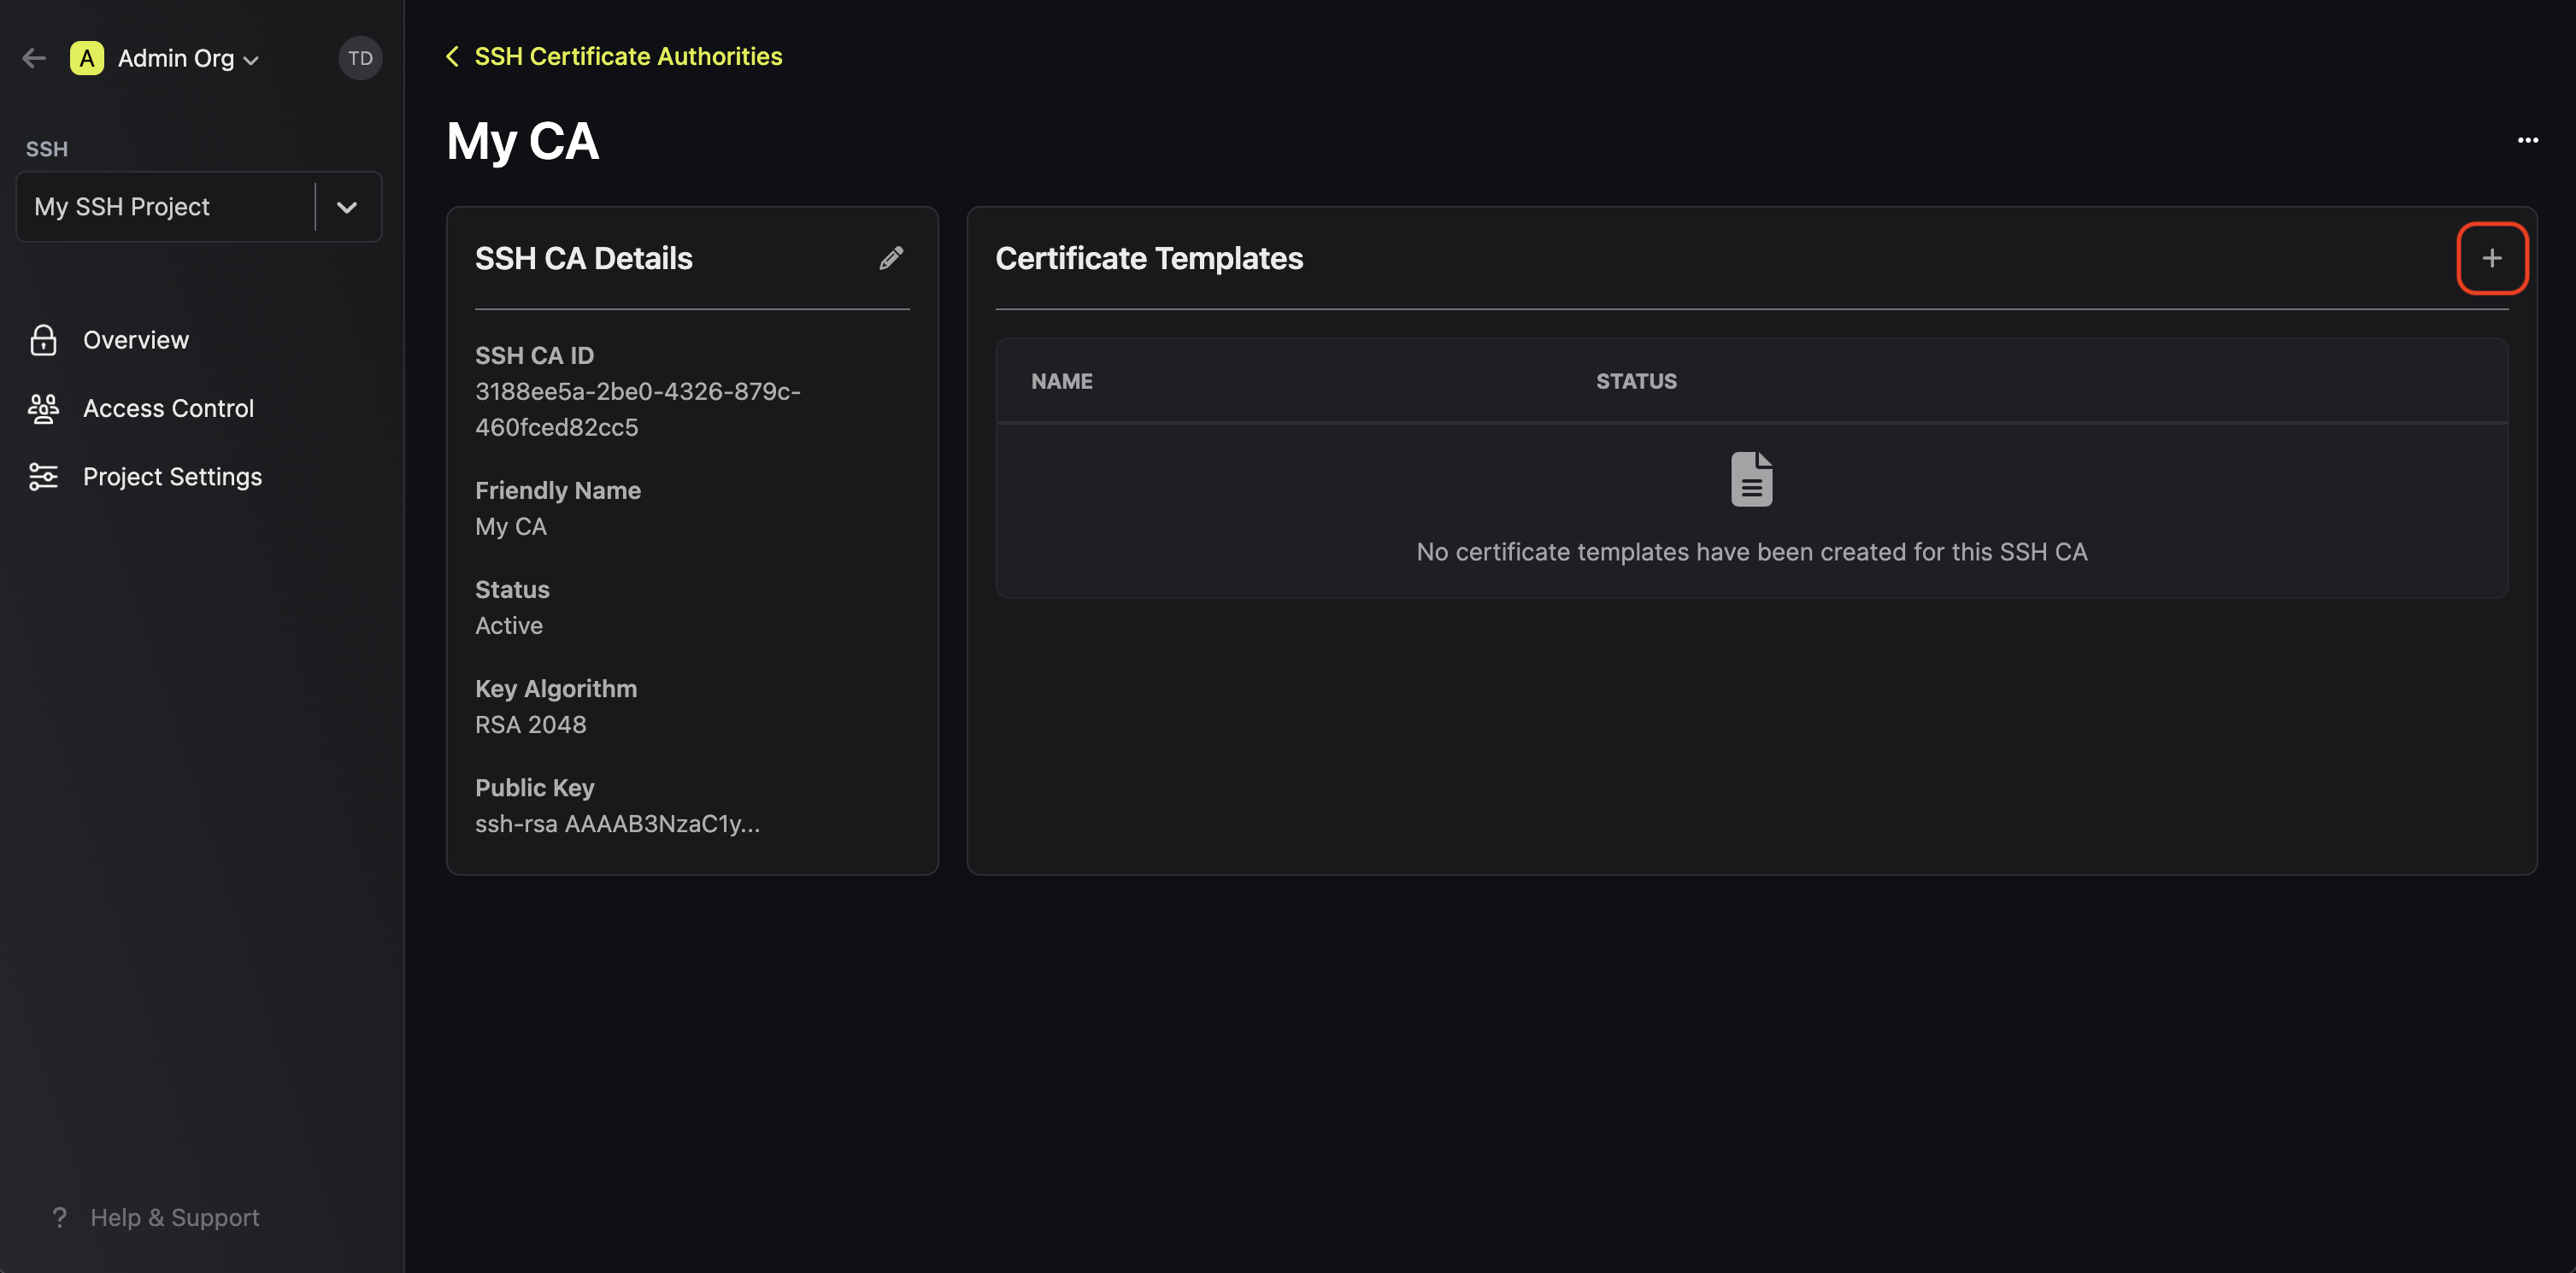
1.3. Next, create a certificate template in the **Certificate Templates** section of the newly-created CA.
A certificate template is a set of policies for certificates issued under that template; each template is bound to a specific CA.
With certificate templates, you can specify, for example, that certificates issued under a template are only allowed for users with a specific username like `ec2-user` or perhaps that the max TTL requested cannot exceed 1 year.
Here's some guidance on each field:
* Friendly Name: A friendly name for the CA; this is only for display.
* Key Algorithm: The type of public key algorithm and size, in bits, of the key pair for the CA. Supported key algorithms are `RSA 2048`, `RSA 4096`, `ECDSA P-256`, and `ECDSA P-384` with the default being `RSA 2048`.
1.3. Next, create a certificate template in the **Certificate Templates** section of the newly-created CA.
A certificate template is a set of policies for certificates issued under that template; each template is bound to a specific CA.
With certificate templates, you can specify, for example, that certificates issued under a template are only allowed for users with a specific username like `ec2-user` or perhaps that the max TTL requested cannot exceed 1 year.
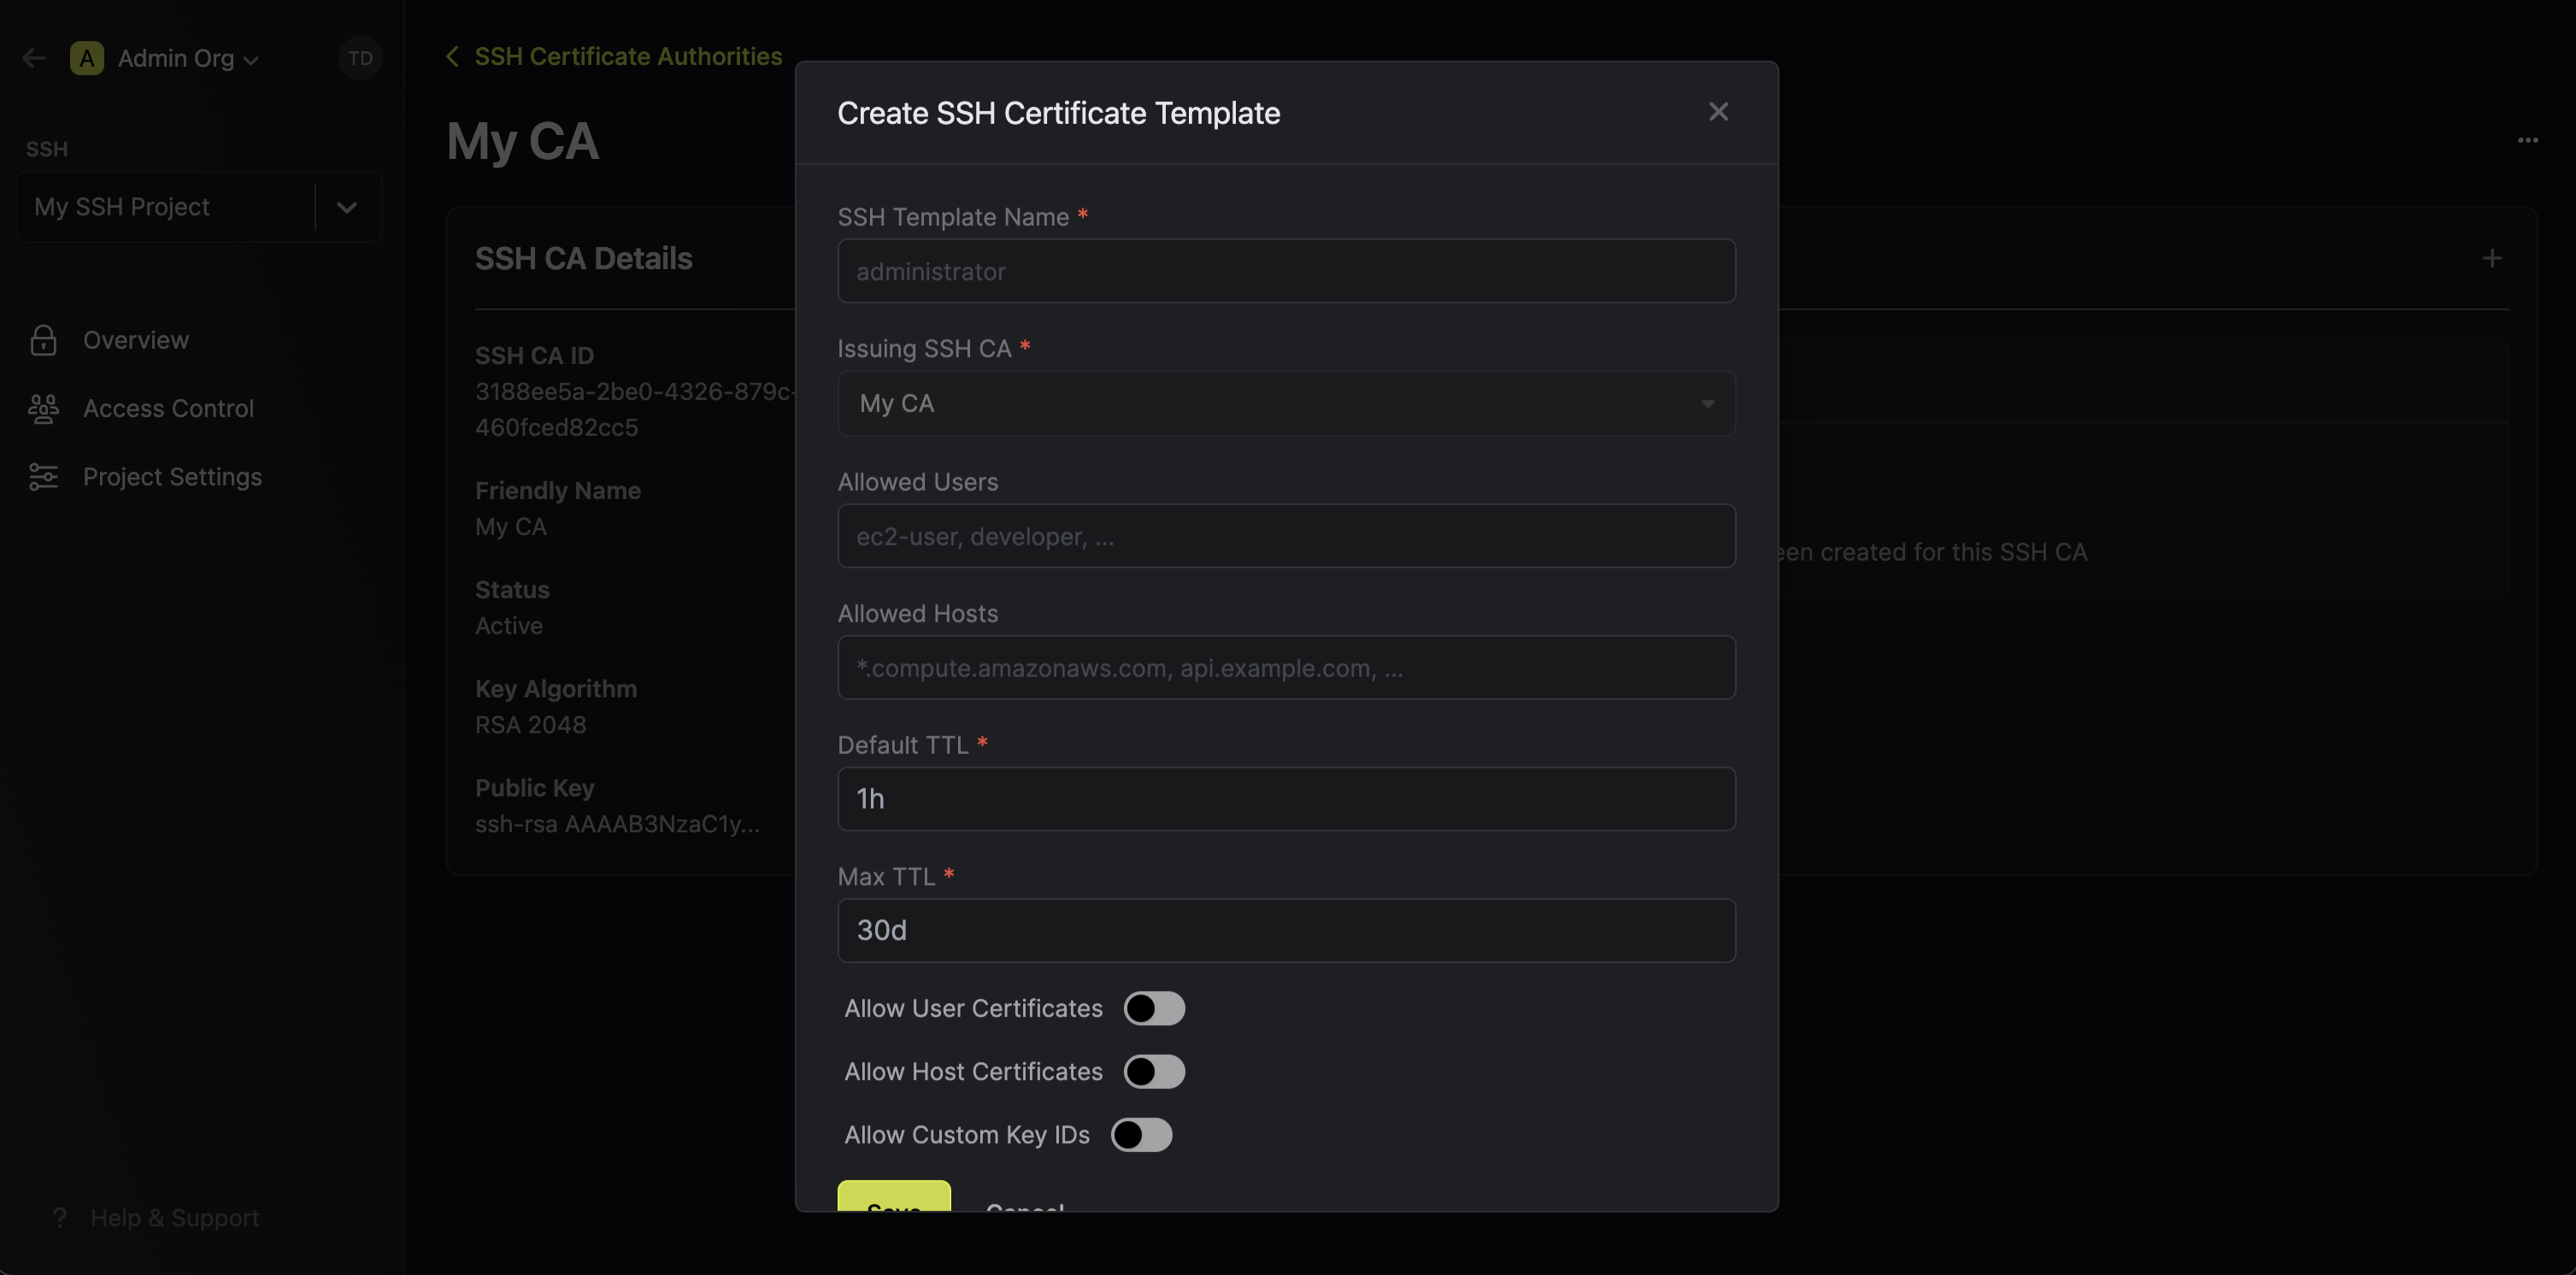 Here's some guidance on each field:
* SSH Template Name: A name for the certificate template; this must be a valid slug.
* Allowed Users: A comma-separated list of valid usernames (e.g. `ec2-user`) on the remote host for which a client can request a certificate for. If you wish to allow a client to request a certificate for any username, set this to `*`; alternatively, if left blank, the template will not allow issuance of certificates under any username.
* Allowed Hosts: A comma-separated list of valid hostnames/domains on the remote host for which a client can request a certificate for. Each item in the list can be either a wildcard hostname (e.g. `*.acme.com`), a specific hostname (e.g. `example.com`), an IPv4 address (e.g. `192.168.1.1`), or an IPv6 address. If left empty, the template will not allow any hostnames; if set to `*`, the template will allow any hostname.
* Default TTL: The default Time-to-Live (TTL) for certificates issued under this template when a client does not explicitly specify a TTL in the certificate request.
* Max TTL: The maximum TTL for certificates issued under this template.
* Allow User Certificates: Whether or not to allow issuance of user certificates.
* Allow Host Certificates: Whether or not to allow issuance of host certificates.
* Allow Custom Key IDs: Whether or not to allow clients to specify a custom key ID to be included on the certificate as part of the certificate request.
1.4. Finally, add the user(s) you wish to be able to request a SSH certificate to the SSH project through the **Access Control** tab.
2.1. Begin by downloading the CA's public key from the CA's details section.
Here's some guidance on each field:
* SSH Template Name: A name for the certificate template; this must be a valid slug.
* Allowed Users: A comma-separated list of valid usernames (e.g. `ec2-user`) on the remote host for which a client can request a certificate for. If you wish to allow a client to request a certificate for any username, set this to `*`; alternatively, if left blank, the template will not allow issuance of certificates under any username.
* Allowed Hosts: A comma-separated list of valid hostnames/domains on the remote host for which a client can request a certificate for. Each item in the list can be either a wildcard hostname (e.g. `*.acme.com`), a specific hostname (e.g. `example.com`), an IPv4 address (e.g. `192.168.1.1`), or an IPv6 address. If left empty, the template will not allow any hostnames; if set to `*`, the template will allow any hostname.
* Default TTL: The default Time-to-Live (TTL) for certificates issued under this template when a client does not explicitly specify a TTL in the certificate request.
* Max TTL: The maximum TTL for certificates issued under this template.
* Allow User Certificates: Whether or not to allow issuance of user certificates.
* Allow Host Certificates: Whether or not to allow issuance of host certificates.
* Allow Custom Key IDs: Whether or not to allow clients to specify a custom key ID to be included on the certificate as part of the certificate request.
1.4. Finally, add the user(s) you wish to be able to request a SSH certificate to the SSH project through the **Access Control** tab.
2.1. Begin by downloading the CA's public key from the CA's details section.
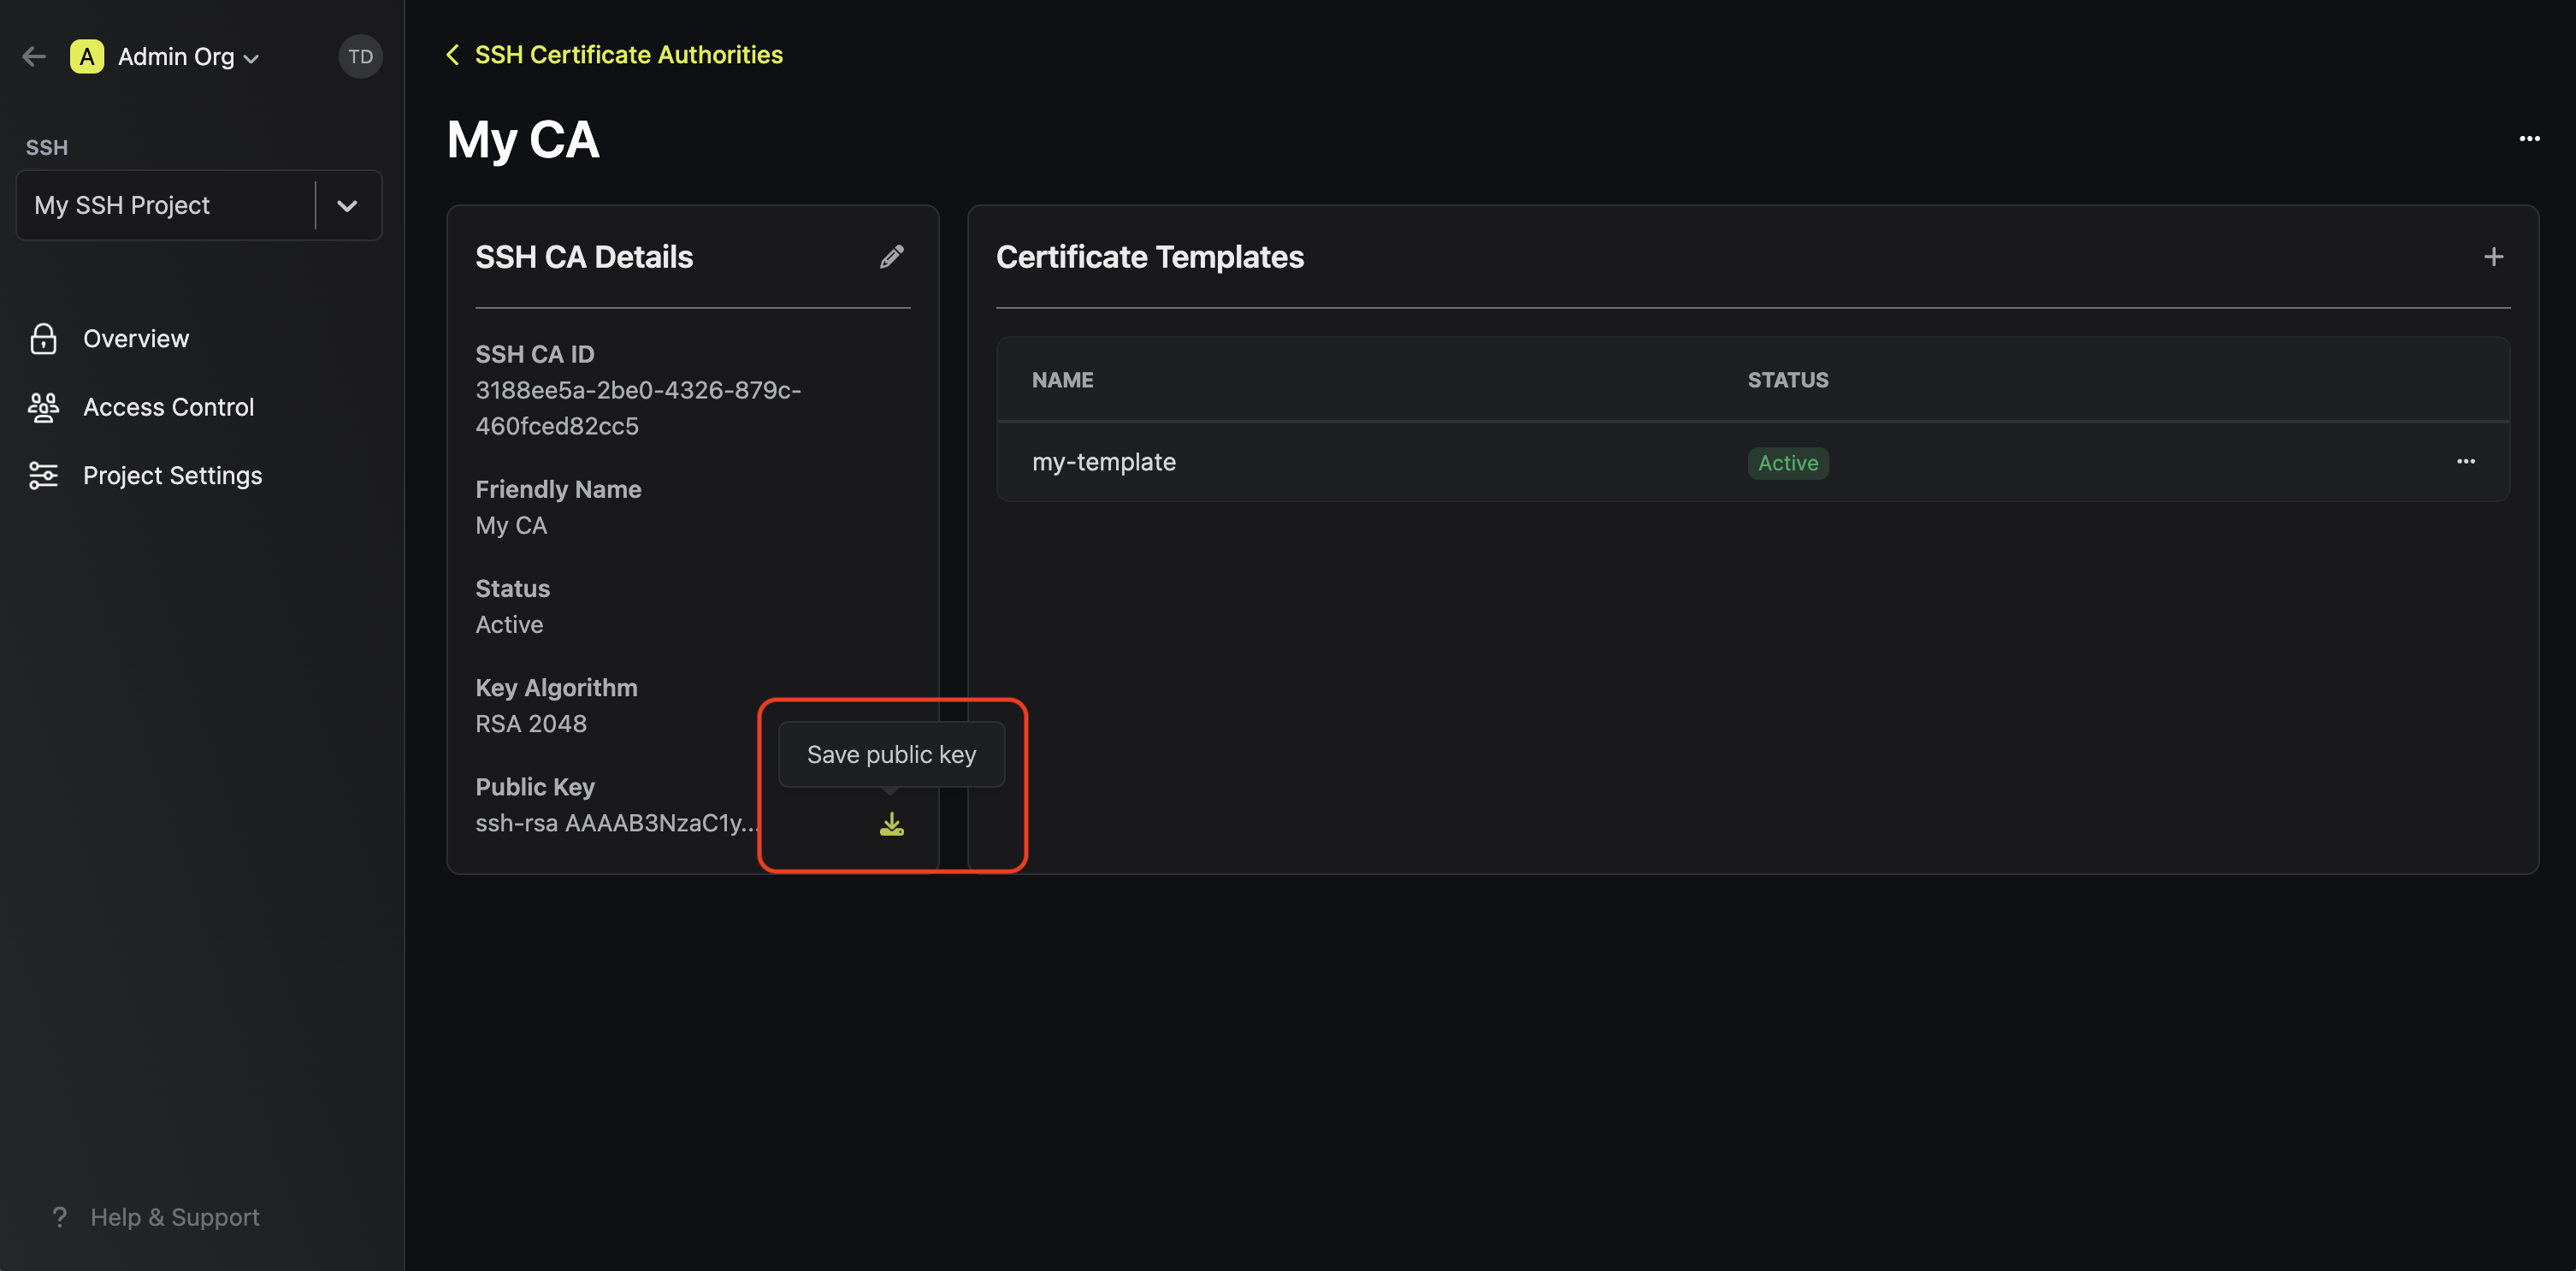 The CA's public key can also be retrieved programmatically via API by making a `GET` request to the `/ssh/ca//public-key` endpoint.
2.2. Next, create a file containing this public key in the SSH folder of the remote host; we'll call the file `ca.pub`.
This would result in the file at the path `/etc/ssh/ca.pub`.
2.3. Next, add the following lines to the `/etc/ssh/sshd_config` file on the remote host.
```bash
TrustedUserCAKeys /etc/ssh/ca.pub
PubkeyAcceptedKeyTypes=+ssh-rsa,ssh-rsa-cert-v01@openssh.com
```
2.4. Finally, reload the SSH daemon on the remote host to apply the changes.
```bash
sudo systemctl reload sshd
```
At this point, the remote host is configured to trust SSH certificates issued by the Encrova SSH CA.
## Guide to Using Encrova SSH to Access a Host
We show how to obtain a SSH certificate and use it for a client to access a host via CLI:
The subsequent guide assumes the following prerequisites:
* SSH Agent is running: The `ssh-agent` must be actively running on the host machine.
* OpenSSH is installed: The system should have OpenSSH installed; this includes
both the `ssh` client and `ssh-agent`.
* `SSH_AUTH_SOCK` environment variable
is set; the `SSH_AUTH_SOCK` variable should point to the UNIX socket that
`ssh-agent` uses for communication.
```bash
encrova login
```
Run the `encrova ssh issue-credentials` command, specifying the `--addToAgent` flag to automatically load the SSH certificate into the SSH agent.
```bash
encrova ssh issue-credentials --certificateTemplateId= --principals= --addToAgent
```
Here's some guidance on each flag:
* `certificateTemplateId`: The ID of the certificate template to use for issuing the SSH certificate.
* `principals`: The comma-delimited username(s) or hostname(s) to include in the SSH certificate.
For fuller documentation on commands and flags supported by the Encrova CLI for SSH, refer to the docs [here](/cli/commands/ssh).
Finally, SSH into the desired host; the SSH operation will be performed using the SSH certificate loaded into the SSH agent.
```bash
ssh username@hostname
```
Note that the above workflow can be executed via API or other client methods
such as SDK.
The CA's public key can also be retrieved programmatically via API by making a `GET` request to the `/ssh/ca//public-key` endpoint.
2.2. Next, create a file containing this public key in the SSH folder of the remote host; we'll call the file `ca.pub`.
This would result in the file at the path `/etc/ssh/ca.pub`.
2.3. Next, add the following lines to the `/etc/ssh/sshd_config` file on the remote host.
```bash
TrustedUserCAKeys /etc/ssh/ca.pub
PubkeyAcceptedKeyTypes=+ssh-rsa,ssh-rsa-cert-v01@openssh.com
```
2.4. Finally, reload the SSH daemon on the remote host to apply the changes.
```bash
sudo systemctl reload sshd
```
At this point, the remote host is configured to trust SSH certificates issued by the Encrova SSH CA.
## Guide to Using Encrova SSH to Access a Host
We show how to obtain a SSH certificate and use it for a client to access a host via CLI:
The subsequent guide assumes the following prerequisites:
* SSH Agent is running: The `ssh-agent` must be actively running on the host machine.
* OpenSSH is installed: The system should have OpenSSH installed; this includes
both the `ssh` client and `ssh-agent`.
* `SSH_AUTH_SOCK` environment variable
is set; the `SSH_AUTH_SOCK` variable should point to the UNIX socket that
`ssh-agent` uses for communication.
```bash
encrova login
```
Run the `encrova ssh issue-credentials` command, specifying the `--addToAgent` flag to automatically load the SSH certificate into the SSH agent.
```bash
encrova ssh issue-credentials --certificateTemplateId= --principals= --addToAgent
```
Here's some guidance on each flag:
* `certificateTemplateId`: The ID of the certificate template to use for issuing the SSH certificate.
* `principals`: The comma-delimited username(s) or hostname(s) to include in the SSH certificate.
For fuller documentation on commands and flags supported by the Encrova CLI for SSH, refer to the docs [here](/cli/commands/ssh).
Finally, SSH into the desired host; the SSH operation will be performed using the SSH certificate loaded into the SSH agent.
```bash
ssh username@hostname
```
Note that the above workflow can be executed via API or other client methods
such as SDK.